NodeMCU V3 ESP8266 開發板安裝
BY 黃家平
第一步 安裝 Arduino IDE download
1. Software | Arduino https://www.arduino.cc/en/software
2. CH340 Drivers https://sparks.gogo.co.nz/ch340.html
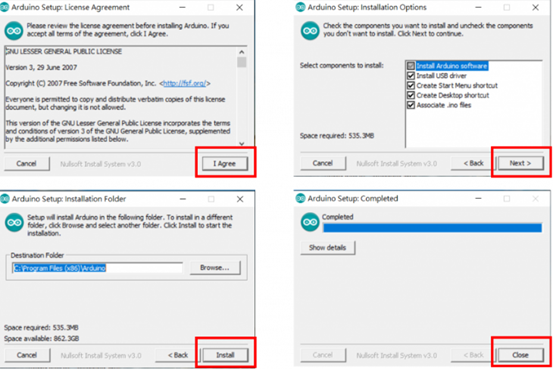
Arduino IDE 安裝 :
在 Arduino IDE 設定 NodeMCU:
於檔案的功能區內看到 【偏好設定】這個選項並開啟。
![]()
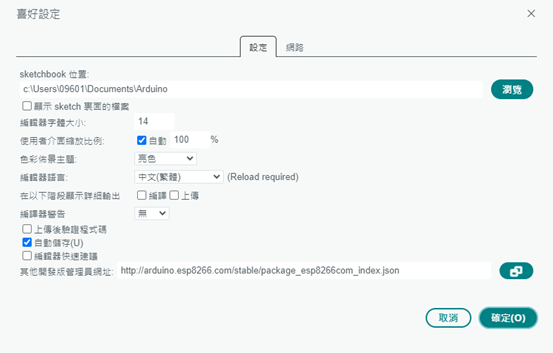
http://arduino.esp8266.com/stable/package_esp8266com_index.json
1. 轉到 【工具】 > 【開發板管理員】
2. 在搜尋框字段中輸入 esp8266 單擊 esp8266 by ESP8266 Community 選項,然後單擊安裝

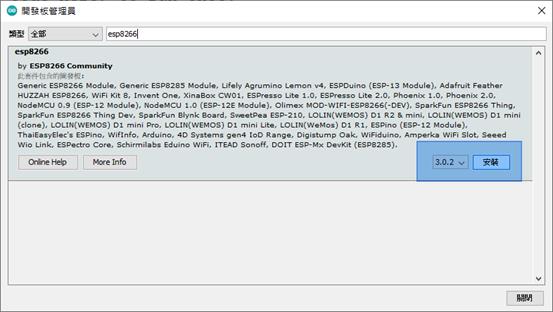
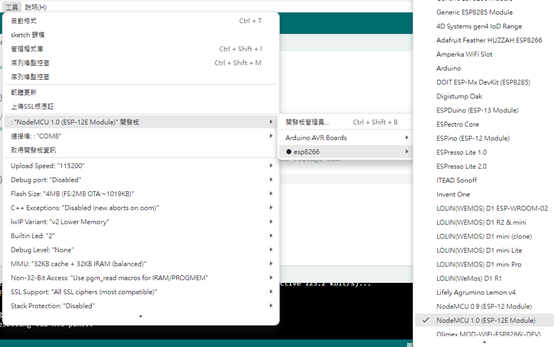
待安裝完成後,您可以再次開啟 Arduino 上方選單區中的【工具】選項。您就可以看到已經擴展的 ESP8266 Boards (3.0x) 選項,裡面有很多種開發板,我們要選擇的是 【NodeMCU 1.0(ESP-12E Module)】
現在可以使用 NodeMCU 開發板做任何您想做的事情,以下我們先測試最簡單的點亮內建 LED 的範例,確認板子是否正確安裝與驅動。
· 在 arduino IDE goto tools>Boards>select NODEMCU 1.0 (ESP - 12E Module)
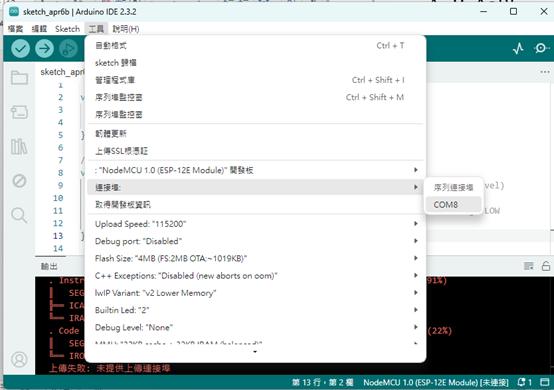
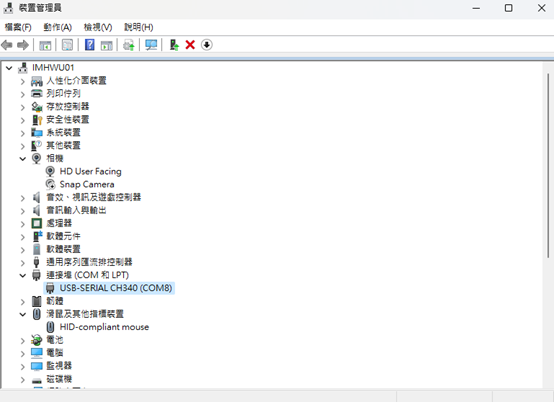
· 再次轉到工具並選擇 NodeMCU 開發板對應的 Com Port 端口。 這點很重要,如果您不確定對應的端口,可以嘗試針對 NodeMCU 進行 USB 傳輸線的拔插對比看看,多了哪一個 Com Port,或者從電腦的裝置管理員來確認,NodeMCU V3 採用 CH340 為USB管理晶片,所以在裝置管理員應該可以看到如下的截圖,在這裡電腦對應為 com8 這個編號。
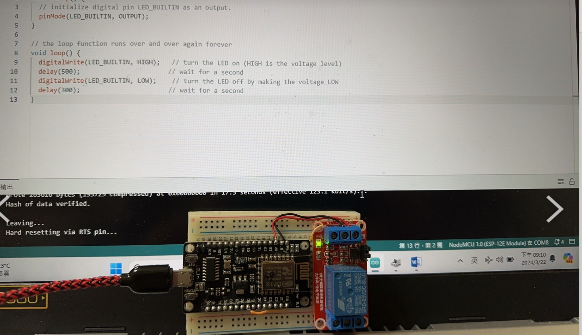
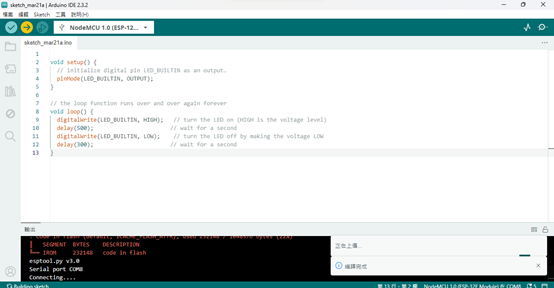
燒錄第一個程式,讓內建的 LED 閃爍。驗證 NodeMCU 是否安裝完成程式碼:
void setup() {
// initialize digital pin LED_BUILTIN as an output.
pinMode(LED_BUILTIN, OUTPUT);
}
// the loop function runs over and over again forever
void loop() {
digitalWrite(LED_BUILTIN, HIGH); // turn the LED on (HIGH is the voltage level)
delay(5000); // wait for a second
digitalWrite(LED_BUILTIN, LOW); // turn the LED off by making the voltage LOW
delay(2000); // wait for a second
}
實作照片與影片